This small project came to be because i needed some (omnidirectional) speakers that could stand outdoor during al seasons, nomatter how much rain or snow gets on them.
The current design that can be downloaded here works, but there improvements are being made based on experience with them being used outdoors.
The design is based on standard DIN 160mm car speakers, but with the adapter ring 130mm DIN speakers can also be used.
It is fairly easy to create and print your own adapter rings for the type of speaker you have laying around.
The main reason for basing things on din160mm car speakers is simple: they can handle some moisture (they're car door speakers!), they are easy to come by in several different watts and the size doesn't make things seem awkward.
Even though i did design it to have airflow for bass going down, do not expect the best bass experience out of these. Best to create a bass speaker seperate if you need it.
(perhaps i will design one for outdoor use also in some future).
Make sure to print the parts with PETG, ABS or any other weather resistant material. Even though everything is painted, it does help if the prints themselves are resistant to outside conditions.
It should also be able to handle the vibration of the speaker (specially bass, even if it's not much) without breaking!
The design is kept simple but does still look nice in my view.
The speaker is constructed in seperate pieces, so the printing can be mostly done with the least amount of support materials. The current design looks like this:
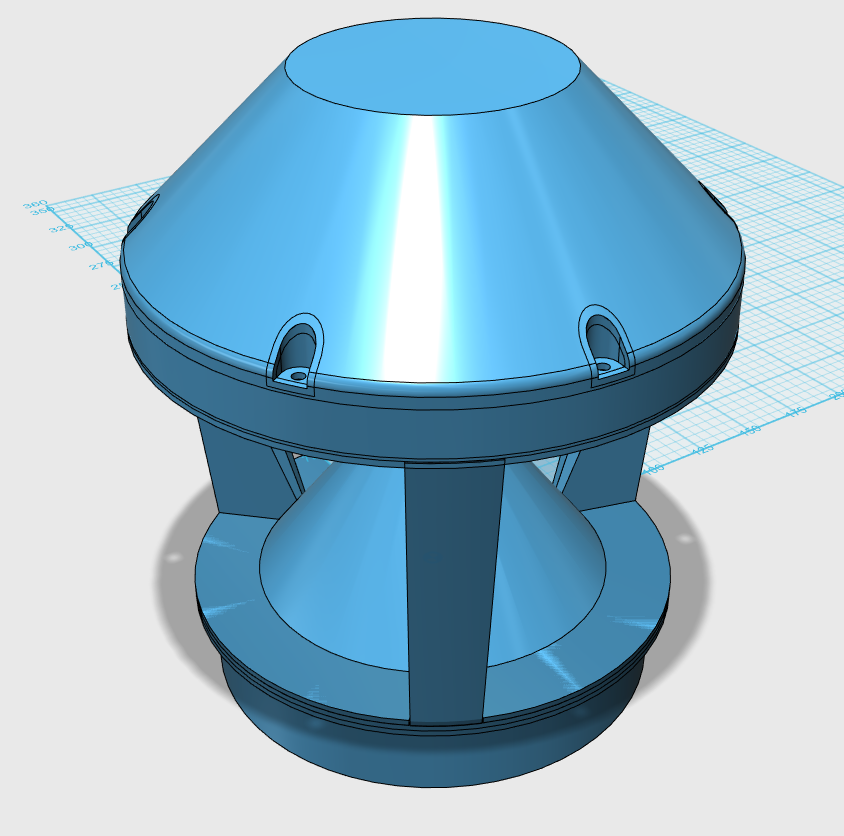
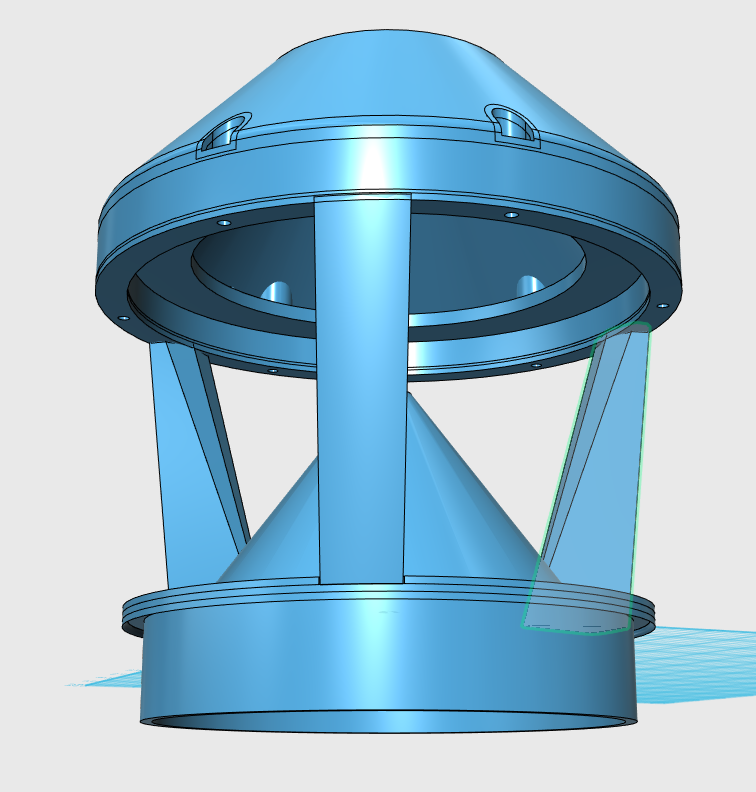
On the right image the hole for the speaker is clearly visible in the top part. Here is where the speaker will sit upside down.
The list of materials to build 1 speaker:
(I have no affiliation with anybody, but to make things easy to find and compare, i added links to places to order directly or to compare to)
| Count |
Item name |
Source |
| 1 |
DIN 160mm car speaker |
|
| 6 |
M4 x 25mm stainless steel bolt |
rvs paleis |
| 4 |
M4 x 10mm stainless steel bolt
These are for fastening the speaker, so do check! |
rvs paleis |
| 6 |
M4 din 917 stainless steel hexagon cap nut, low model |
rvs paleis |
| 4 |
M4 din 934 stainless steel hexagon nut |
rvs paleis |
| 4 |
stainless steel rings, DIN 9021 |
rvs paleis |
| 25cm |
160mm PVC drainage pipe, SN8 preferred (SN4 is usually 4mm, SN8 is around 4.7 mm) |
160mm SN8 pipe
160mm SN4 pipe
|
|
speaker cable, the size depends on the distance |
|
| 1 set |
3d printed parts |
|
| 1 |
Optional: male + female waterproof plug set |
waterdichte 2 polige connectorset |
| 1 |
Optional: drawer or cabinet handle, rustproof (aluminium, stainless steel, etc).
I found some excellent ones at the local Karwei shop. |
Karwei greep anke 72mm |
| 1 |
Optional: Rubber grommet, size depends on your cable and plugs.
It is hard to find 4 to 5mm thick ones, so i used one for thinner plate and hot-glued it in.
The referred to snap-light grommets are for cable without a plug!
The mentioned plugs are 20mm wide. A snap light for this is available on the same site.
|
Snap light grommet 7-10mm round cable. |
| 1 |
Optional: speakon plug and chassis part |
speakon chassis part
speakon plug
|
| 1 - 2 kg |
concrete or cement mix |
This is to add weight to the base so the speaker can't topple over easy. Other materials could be used. For instance a 160mm pipecap and some lead or iron would work also. |
| 1 |
primer and paint, in a color you like. I went for 'rock' (dark greyish color). |
|
Notes:
You can choose how the cable is fed into the speaker. I opted for speakon plugs myself (i have to move them around regularly), which needs ofcourse the speakon chassis part and plugs. To be able to still split the top part from the pipe, a connector is required inside.
The parts (printed and ordered) are in the list as optional.
If you use speakon, you don't need the grommet etc..
All the 3d printed parts are designed with a max built volume of 20x20x20cm in mind.
The exploded view shows the main printed parts for 1 complete speaker, including the 130mm conversion ring:
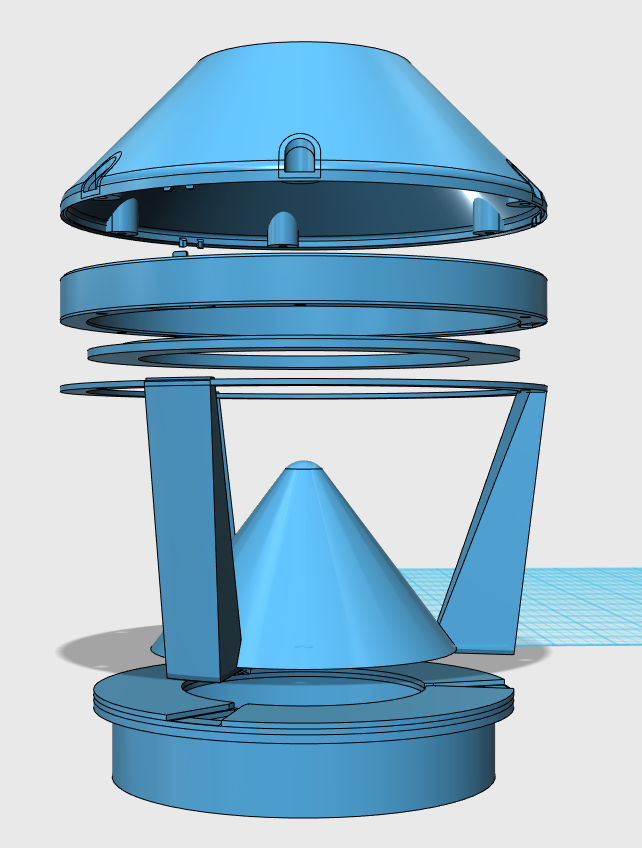
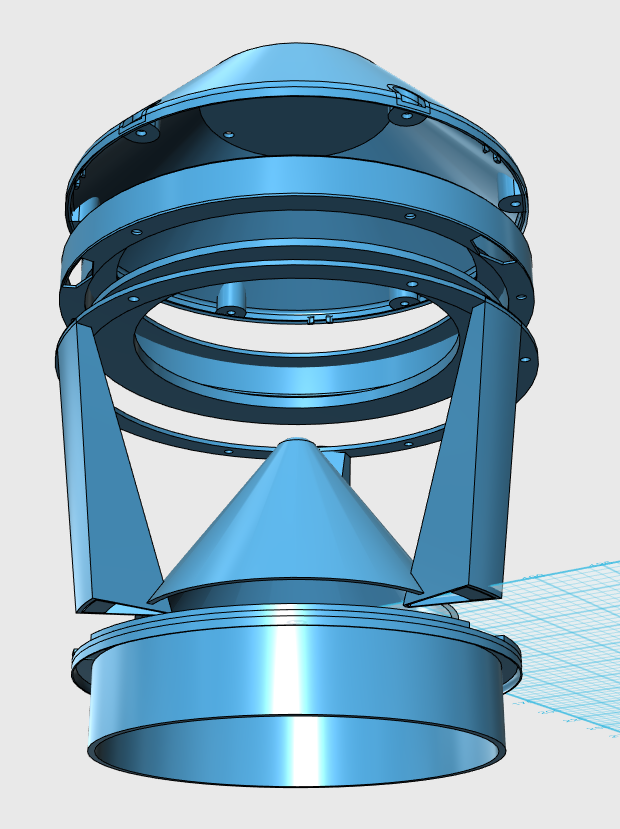
If you would like to use the speakon chassis, the parts for this:
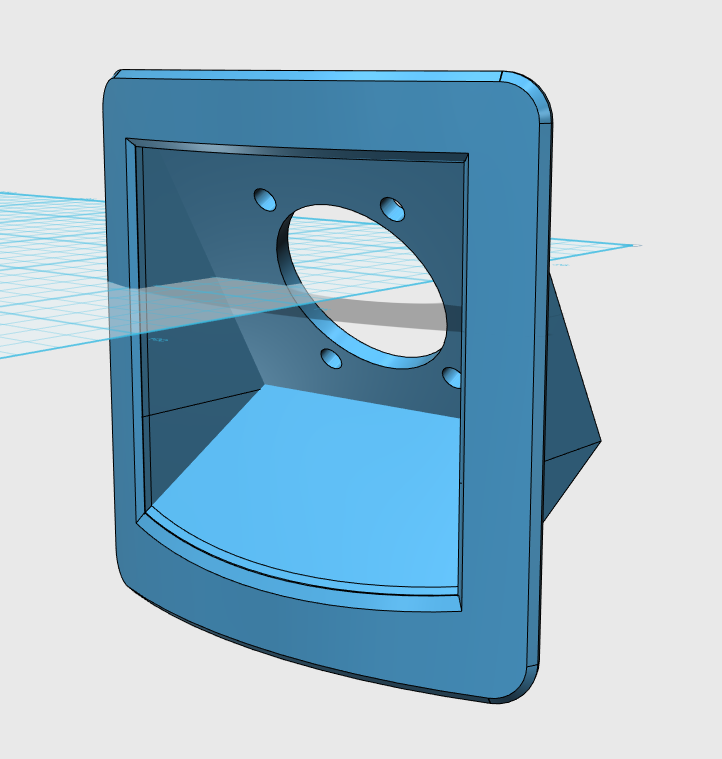
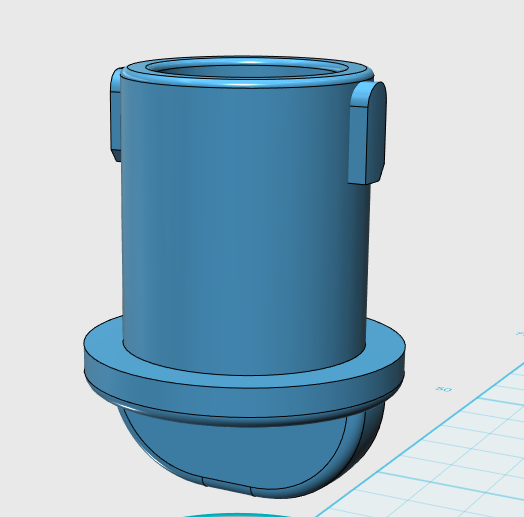
The front is curved to fit the 160mm pipe.
The speaker parts to download:
| Item |
Best printed |
|
Top cap v2
|
Upside down.
This will need the least support material, only for the flat surfaces where the bolts sit.
|
| Speaker ring v2 |
Right side up.
Does need more support but removing support between the inner and outer wall is hard. |
| Center part v1 |
Upside down.
It will only need a small support for the cone in the middle. |
| Bottom plate v1 for 160mm SN8 drainage pipe. |
Upside down. Only slight support is needed for the places where the uprights will be glued in. |
| Optional: adapter 130mm. |
With the inner ring up, no support needed that way. |
| Optional: Speakon chassis part. |
Backside surface of the plate with the holes on the buildplate. |
| Optional: Speakon dummy plug. |
Upright, it is impossible to get the supports out of the center hole!. |
Notes on these:
- The center and bottom part have to be glued together, not bolted. The type of glue depends on what you made the prints with, 2 component epoxy for plastics works for most types of filament.
- The bottom plate is designed for a 160mm SN8 pvc drainage pipe. It fits SN4, but will have some space inside. The height of the pipe can be any height you like
- To install 130mm speakers you will need an adapter ring: adapter 130mm. Drop it in from the bottom and glue it to the speaker ring/
- The speakers are mounted upside down, they should be pushed in from the bottom. This is why the speaker ring is seperate from the center part: the speakers wont fit between the posts to put them in.
- Do not sand down the rim of the posts that stick out above the top ring! These rims are intentional and fit in the bottom of the speaker ring.
- If you put in the speakon chassis parts, for convenience i made a template for the speakon part: Speakon hole template
- I did design a speakon dummy plug to close off the speakon plugs when not in use, to prevent dus, water and other stuff coming into the chassis part.
- Start with printing all the needed parts.
- Make sure all parts fit together and glue the center part to the bottom plate.
- Sand and paint all the parts to make sure they are sealed and so moisture can creep into the printed parts themselves.
- Take the speakers you have, mark the places for the M4x10 bolts in the speaker ring and drill the holes for these. Make sure that the speakers are mounted upside down once the part is in it's final place!
- If you need the 130mm adapter, then first glue this ring in place, then mark the bolt positions and drill the holes.
- Fasten the speakers to the speaker ring and attach the speaker cable to the speaker.
- Run the speaker cable down through the hollow posts of the center part (and corresponding holes in the speaker ring).
- If you have them, attach the handles to the top cap
- Bolt the top cap to the speaker ring using the 6 M4x25mm bolts and the DIN 917 nuts (no rings needed, do not overtighten these)
With this completed, you have the speaker part assembled.
The 160mm pipe is used as a stand for it:
- If you use the speakon option, make the holes for the parts in the pipe and use epoxy to glue them in. The top for the chassispart has to be around 60mm from the top of the pipe and make sure that the speakon faces DOWN!!!
- If you do not use speakon: Drill a hole in the side. The size depends on the cable size or the cable grommet.
- Close off the bottom part of the pipe with a temporary cap.
- Glue in some leftover plastic just above the cap, this will prevent the dried concrete from sliding out.
- Make some conrete or cement mix. Put the pipes upright on a flat surface to make sure stuff doesn't leak out from underneath. Then pour in a nice layer of concrete.
- Once dry, paint the pipe also.
- Put in the speakon chassis part from the backside, so the front sits flush with the chassis, or put in the rubber grommet for the cable.
- If you don't use the plugs, just attach the long cable to the speaker cables of the speaker.
Note:
It is by far preferred to use some plugs inside, this way you can seperate the speaker from the pipe so you do not carry the full weight of the concrete with the speaker.
It also keeps your options open to make other stands for the speakers if you need them!
I did print the dummy plug to close off the speakon connectors, just in case. If you can't twist them to lock them, just slightly file the tab on the bottom (with the chamfer) down. usually 0.1 mm already is enough!
I also painted the top of these bright red. While in use, i just put them inside the speakerpipe.
And here's my complete build, painted and finished:

Before using, pick your spot! Picking the right spot makes sure you can get your sound or music at all the spots you want.
If you found your spot, place your amp in a dry place and route your mains + sound signal to it.
Next, route your speaker cable to the speaker spot, preferably in such a way nobody can trip over them!! Also it's nice if you can do it in such a way they are not seen at all.
Take a stand and a speaker, feed the long cable through the grommet, connect it all up and put the speaker ontop of the stand.
Switch on the amp, feed it some music and adjust the volume to the correct level.
Enjoy!


